
How to make a fabric wreath
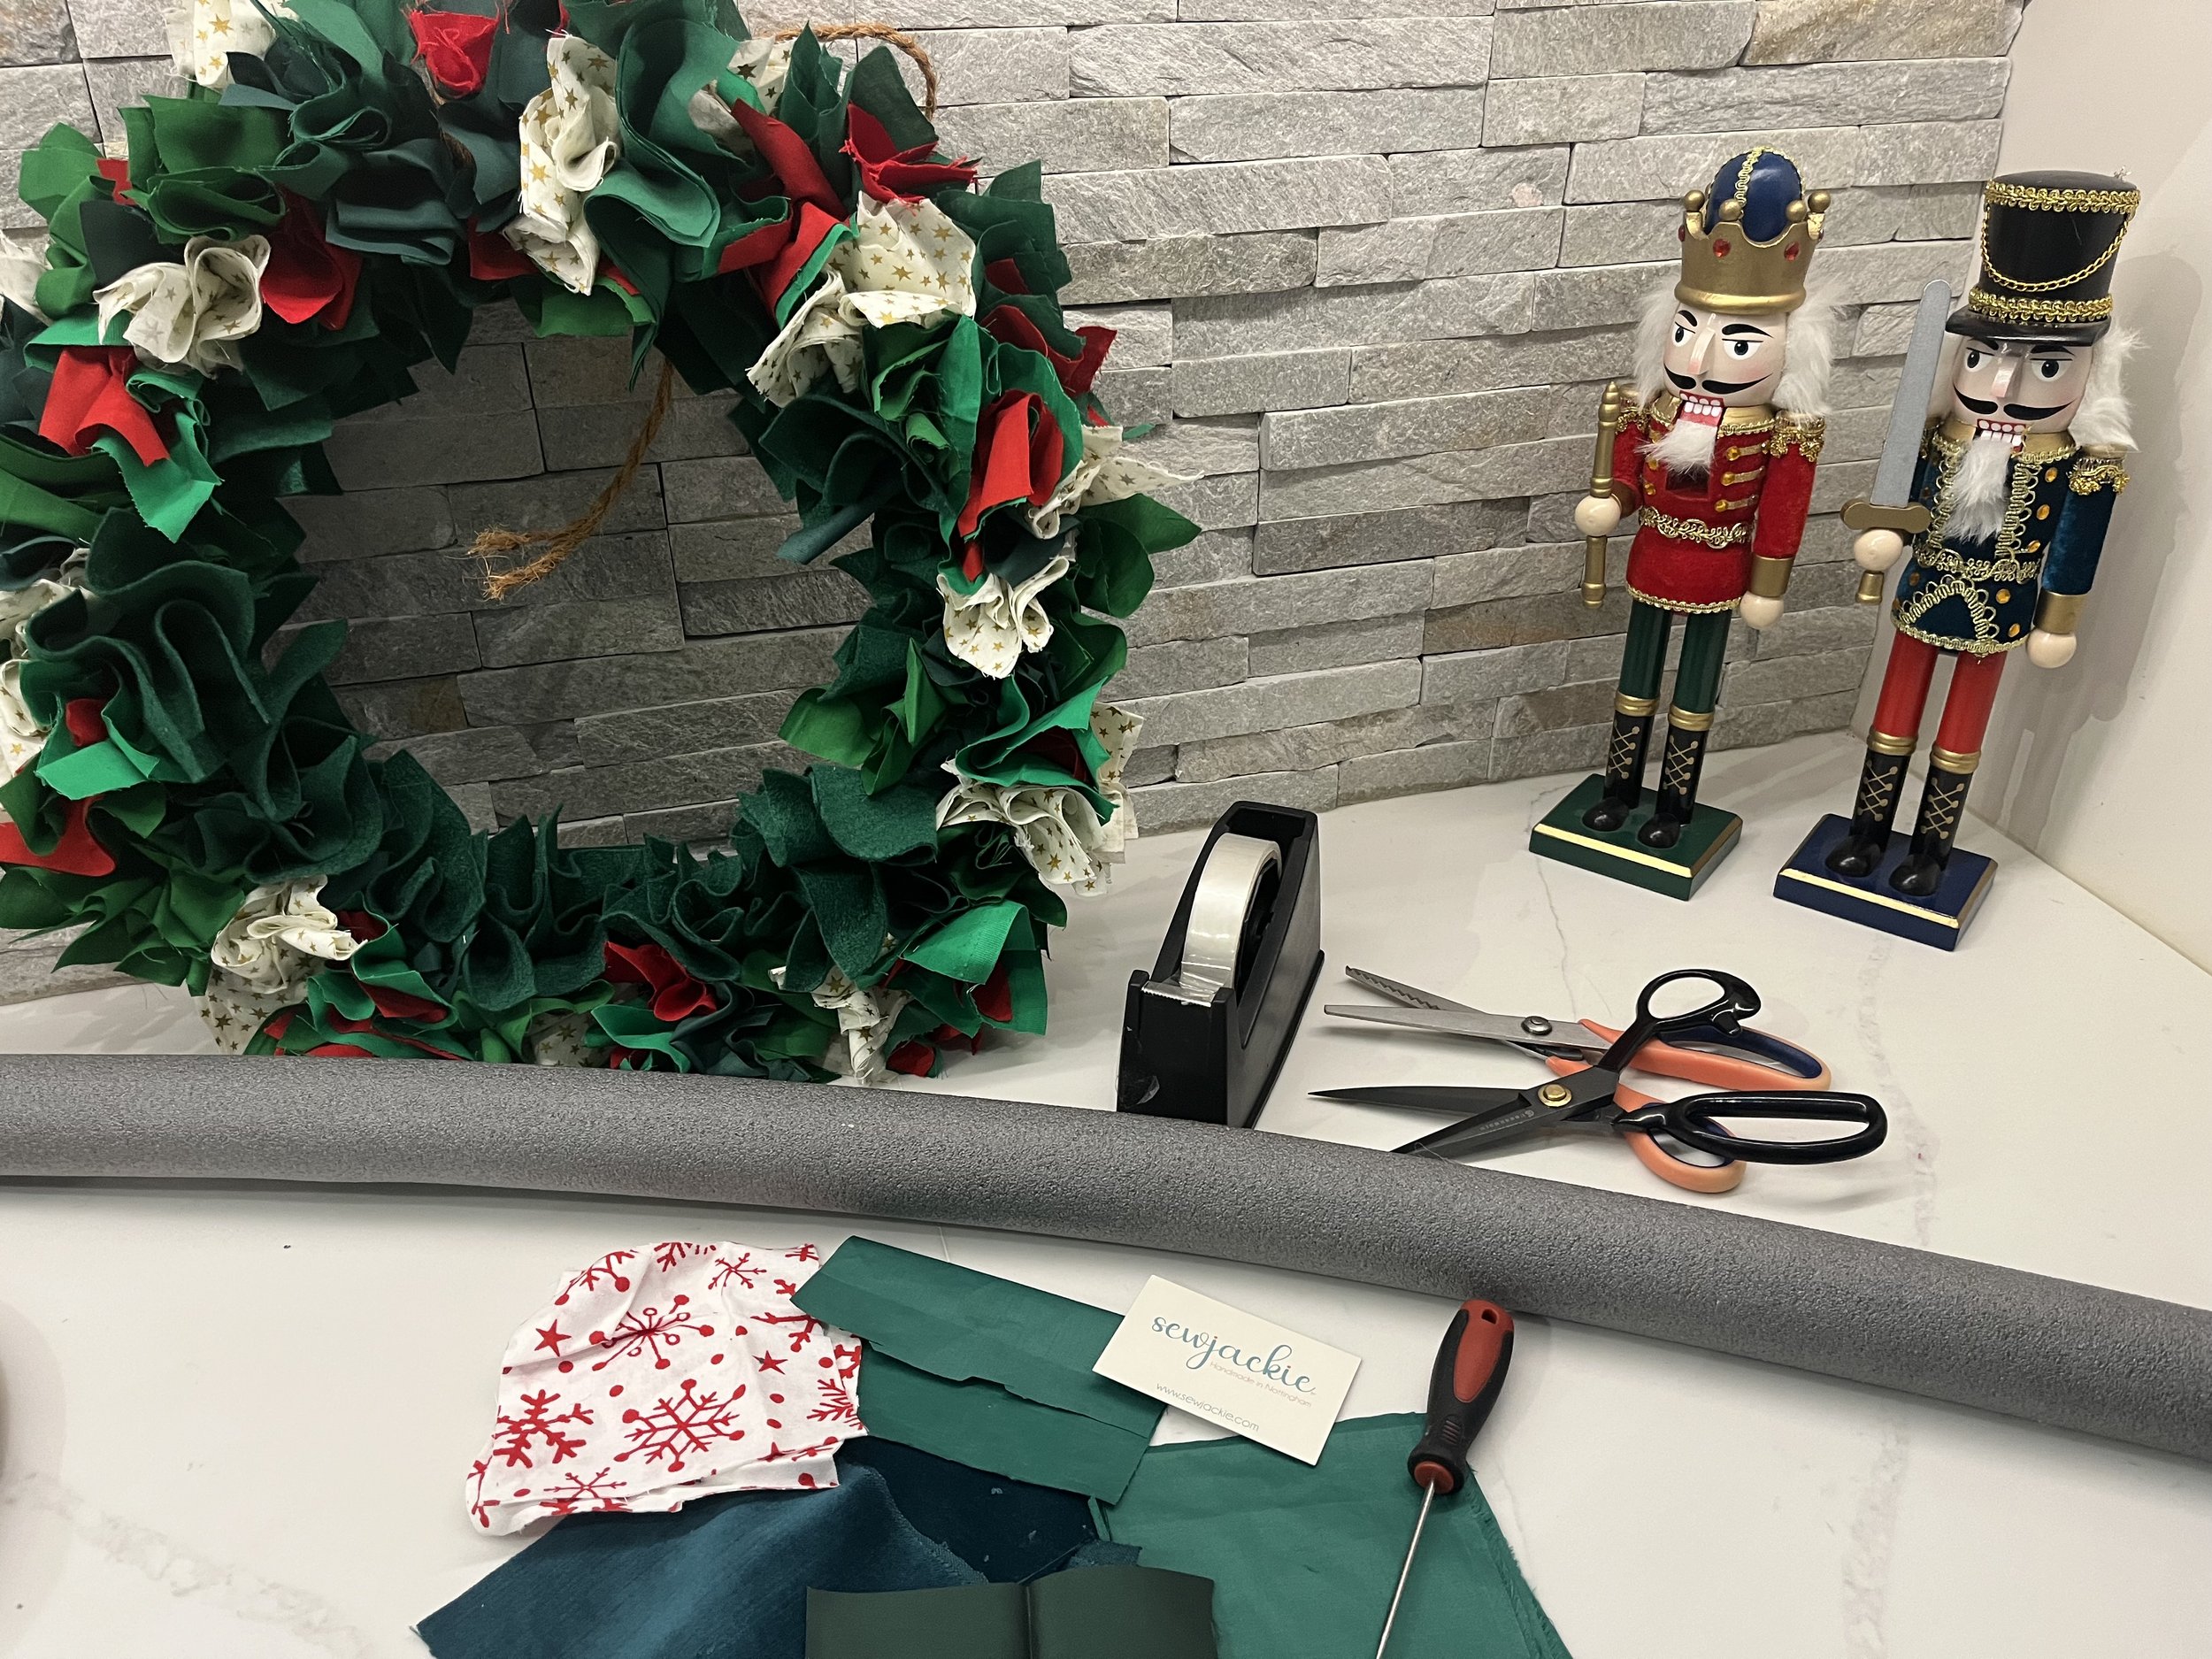
What You’ll Need
Fabric scraps (cut into 5 inch squares)
Pipe insulation foam
Strong tape (such as duct tape)
Bradawl or similar hole-punching tool
Scissors or pinking shears
Step-by-Step Instructions
1. Prepare Your Fabric
Cut your fabric scraps into 5-inch squares (or your desired size)
Mix colours, patterns, and textures for a full, scrappy effect.
2. Make the Wreath Base
Bend your pipe insulation foam into a circle.
Secure the ends firmly with tape so the shape holds.
3. Add the Fabric
Use a bradawl to punch holes around the foam ring.
Push each fabric square 1–2 inches into the hole using the end of your tool or a blunt
knitting needle.
Continue adding fabric in contrasting colours until the wreath begins to look full and
fluffy.
4. Finish and Fluff

Keep going until you can no longer see the foam base, if hanging on a wall or door you
do not need to add fabric scraps to the back of the piping.
Give your wreath a gentle shake to fluff up the fabric.
Trim any longer pieces if needed.
Optional: Add a ribbon, bow, or hanging loop to display your wreath.
I’d be delighted if you would share your photos on my instagram account of your finished
wreaths @sewjackie
www.sewjackie.com